Are you looking to set up your condenser microphone? Whether you’re recording music, podcasts, or voiceovers, getting your microphone set up properly is crucial for achieving professional-quality audio. But with so many different types of microphones and recording setups, it can be overwhelming to know where to start. Don’t worry, we’ve got you covered.
In this article, we’ll walk you through everything you need to know about setting up your condenser microphone. From choosing the right microphone for your needs to connecting it to your computer, we’ll cover all the basics so you can start recording great audio right away. So grab your mic, and let’s dive in!
Key Takeaways
- Choosing the right condenser microphone is crucial for achieving professional-quality audio.
- Setting up your condenser microphone involves connecting it to your computer and adjusting your recording settings.
- By following these simple steps, you can start recording great audio right away.
Choosing the Right Condenser Microphone
When it comes to choosing the right condenser microphone, there are several factors to consider. Understanding the different types of microphones, polar patterns, and your specific needs will help you make an informed decision.
Understanding Different Microphone Types
There are two main types of microphones: dynamic and condenser. Dynamic microphones are rugged and versatile, making them ideal for live performances and recording loud instruments like drums and electric guitars.
On the other hand, condenser microphones are more sensitive and offer a wider frequency response, making them ideal for capturing vocals and acoustic instruments.
Polar Patterns and Their Impact
Polar patterns refer to the directionality of a microphone and how it picks up sound. There are several types of polar patterns, including cardioid, omnidirectional, and figure-8. Cardioid microphones are the most common and are ideal for recording vocals or solo instruments. Omnidirectional microphones pick up sound from all directions, making them ideal for capturing ambient sound or group performances.
Figure-8 microphones pick up sound from the front and back, making them ideal for recording duets or interviews.
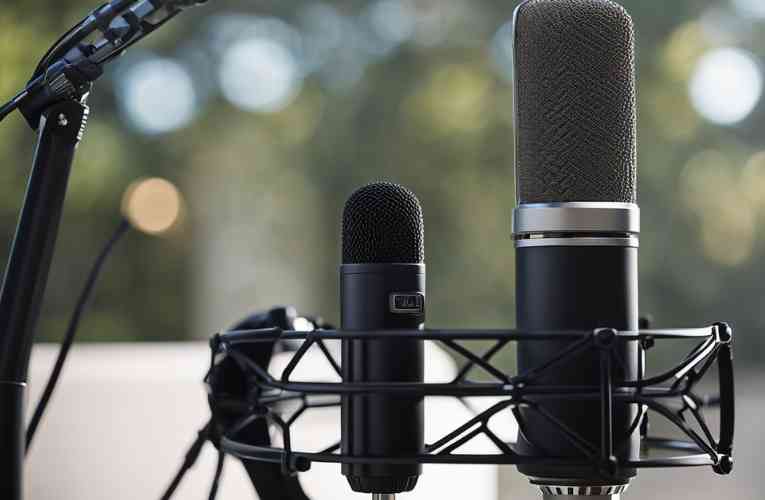
Selecting a Microphone for Your Needs
When selecting a microphone, it’s important to consider your specific needs. If you’re a beginner, you may want to start with a budget-friendly option like the MXL 990. If you’re a professional recording artist, you may want to invest in a high-end condenser microphone like the Neumann U87.
Remember to consider the microphone’s frequency response, sensitivity, and noise level when making your decision.
Related Posts:
How to Set Up Condenser Microphone?
Setting up a condenser microphone can be a bit tricky if you’re new to it. But no worries, we’ve got you covered. Here are the steps you need to follow to set up your condenser microphone:
Step 1: Position Your Microphone
Ensure that the microphone is facing the sound source and is positioned at the ideal distance, typically 6-8 inches from your mouth for vocal recording. For instrument recording, experiment to find the optimal distance.
Step 2: Connect to an Audio Interface
Plug one end of the XLR cable into the microphone and the other end into the audio interface, which connects the microphone to your computer for audio recording.
Step 3: Adjust Gain and Levels
After connecting the microphone to the audio interface, adjust the gain to control sensitivity and the levels to manage volume. Set the gain to an appropriate level to avoid distortion or noise, and ensure that the levels are neither too high nor too low.
Related Posts:
- The complete process of connecting a condenser mic to your computer
- Speaking Techniques for Condenser Mic Users
- Effects of time on condenser microphone performance
Recording Tips and Techniques
When it comes to recording with a condenser microphone, there are several tips and techniques that you can use to achieve optimal sound quality and minimize background noise. Additionally, utilizing pop filters and shock mounts can help further improve the quality of your recordings.
Achieving Optimal Sound Quality
To achieve optimal sound quality when recording with a condenser microphone, it is important to position the microphone correctly. You should place the microphone close to the sound source, but not so close that the sound becomes distorted. Additionally, you should experiment with different microphone positions to find the one that produces the best sound quality.
Another tip for achieving optimal sound quality is to use a high-quality microphone cable. Low-quality cables can introduce noise and interference into your recordings, which can significantly reduce the overall sound quality.
Minimizing Background Noise
Background noise can be a significant problem when recording with a condenser microphone. To minimize background noise, it is important to choose a quiet recording environment. You should also turn off any unnecessary equipment and appliances that could introduce noise into your recordings.
Additionally, you can use noise reduction software to remove any unwanted background noise from your recordings. This software can be particularly useful when recording in noisy environments.
Utilizing Pop Filters and Shock Mounts
Pop filters and shock mounts are two accessories that can help improve the quality of your recordings. Pop filters are designed to reduce plosives, which are explosive sounds that can occur when pronouncing certain letters, such as “p” and “b”. Shock mounts, on the other hand, are designed to reduce vibrations and noise that can be caused by handling the microphone or by other sources of vibration.
By utilizing these accessories, you can significantly improve the quality of your recordings and ensure that they are free from unwanted noise and interference.
Conclusion
Congratulations! You have successfully set up your condenser microphone. With the right equipment and knowledge, you can now record high-quality audio for your podcasts, music, voiceovers, and more.
Remember to select the appropriate connection method, adjust the audio settings, and position the microphone correctly for optimal performance. Experiment with different recording techniques and microphone placements to find the perfect setup for your needs.
Always handle your microphone with care and keep it clean to ensure longevity and maintain audio quality. Refer to the manufacturer’s instructions for specific cleaning and maintenance guidelines.
With these tips, you can confidently produce professional-grade audio recordings with your condenser microphone. Happy recording!
Frequently Asked Questions
What equipment is required to provide phantom power for a condenser microphone?
Phantom power is required for condenser microphones to operate. This power is typically supplied by an audio interface or mixing console. In order to provide phantom power, you will need a device that is capable of supplying +48V of DC power. Some microphones may also require a preamp to boost the signal before it is sent to the recording device.
Can a condenser microphone be used with a smartphone, and if so, how?
Yes, you can use a condenser microphone with a smartphone. However, you will need an adapter that allows you to connect the microphone to your phone. One option is to use a USB audio interface that is compatible with your smartphone. Another option is to use a TRRS to XLR adapter cable that allows you to connect the microphone directly to your phone.
What are the steps to set up a professional condenser microphone for recording?
To set up a professional condenser microphone for recording, you will need to follow these steps:
1. Connect the microphone to your audio interface or mixing console.
2. Turn on phantom power.
3. Adjust the gain on your interface or console.
4. Position the microphone in front of the sound source.
5. Adjust the microphone placement and angle to achieve the desired sound.
How can I configure a condenser microphone for use with a laptop?
To configure a condenser microphone for use with a laptop, you will need to connect the microphone to an audio interface that is compatible with your laptop. You may also need to install drivers or software for your interface. Once the microphone is connected, you can adjust the gain and other settings using your recording software.
What is the proper technique for speaking into a condenser microphone?
To speak into a condenser microphone, you should position the microphone at a distance of about 6-12 inches from your mouth. Speak directly into the front of the microphone, and avoid breathing directly into the mic. You should also avoid tapping or hitting the microphone, as this can cause unwanted noise.
What adjustments are necessary for using a condenser microphone during a live performance?
When using a condenser microphone during a live performance, you will need to adjust the gain and other settings on your mixing console or audio interface. You may also need to adjust the placement of the microphone to avoid feedback and other unwanted noise.