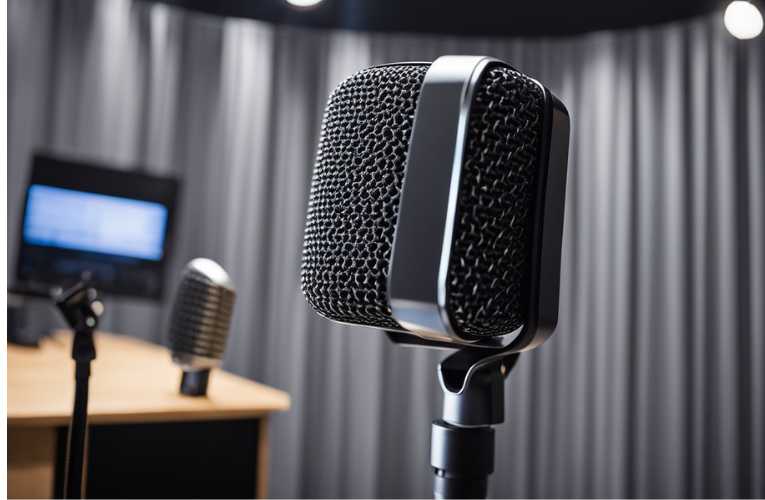
If you’re looking to record deep vocals, a condenser mic can be a great tool to have in your arsenal. However, recording deep vocals can be tricky, as the low frequencies can be difficult to capture and may result in muddy or boomy recordings. In this article, we’ll provide you with some tips for recording deep vocals with a condenser mic, so you can achieve clear and professional-sounding recordings.
Table of Contents
ToggleKey Takeaways
- Proper setup of your recording space can minimize unwanted background noise when recording deep vocals with a condenser mic.
- Use a pop filter to prevent plosives and sibilance from distorting your recordings.
- Experiment with microphone placement and gain settings to find the sweet spot for capturing deep vocals without any muddiness or boominess.
Understanding Condenser Mic

When it comes to recording deep vocals, using a condenser microphone is often the preferred choice. Condenser mics are known for their sensitivity and ability to capture the nuances of vocal performances. In this section, we will explore the different types of condenser mics and how polar patterns can impact the recording process.
Types of Condenser Mics
There are two main types of condenser microphones: large diaphragm and small diaphragm. Large diaphragm mics are often preferred for recording vocals due to their ability to capture a wider range of frequencies. They also tend to have a warmer, more natural sound. Small diaphragm mics, on the other hand, are better suited for recording instruments and high-frequency sounds.
Polar Patterns and Their Impact
Condenser mics also come with different polar patterns, which determine the directionality of the microphone. The most common polar patterns are cardioid, omnidirectional, and figure-8. Cardioid mics are the most popular for recording vocals as they capture sound from the front and reject sound from the sides and rear. Omnidirectional mics capture sound from all directions, making them ideal for recording in a large room or capturing ambient sounds. Figure-8 mics capture sound from the front and back, making them useful for recording duets or interviews.
Understanding the different types of condenser mics and polar patterns is essential when recording deep vocals. Choosing the right microphone and polar pattern can make a significant difference in the final recording.
Related Posts:
Setting Up the Recording Space

When recording deep vocals with a condenser mic, the recording space plays a critical role in the quality of the recording. Here are some tips to set up your recording space correctly.
Room Acoustics
The acoustics of your recording space are crucial to achieving a clear and professional sound. When recording deep vocals, it’s important to choose a room with minimal reverb and echo. A small, carpeted room with soft furnishings is ideal for recording deep vocals.
If your recording space has hard surfaces, consider using acoustic foam or blankets to absorb sound waves and minimize reflections.
Mic Placement
Mic placement is another essential factor to consider when recording deep vocals with a condenser mic. Place the mic at a distance of around 6 to 12 inches away from the singer to capture the nuances and tonal qualities of the vocalist’s voice. It’s also important to position the mic at the right angle to avoid picking up unwanted sounds. Experiment with different mic placements to find the sweet spot that works best for your recording.
Pop Filters and Sound Shields
Pop filters and sound shields are essential tools for recording deep vocals with a condenser mic. Pop filters help to minimize plosives and sibilance, which can cause distortion in the recording. A sound shield is also useful in reducing unwanted noise, especially if your recording space is not acoustically treated. Use a pop filter and sound shield together for the best results.
Related Posts:
Tips for Recording Deep Vocals with a Condenser Mic

If you have a deep voice, you may find it challenging to record vocals that sound clear and crisp. However, with the right techniques and equipment, you can achieve a great recording. In this section, we will provide you with some tips for recording deep vocals with a condenser mic.
Breathing and Technique
When recording deep vocals, breathing and technique are crucial. You should practice breathing exercises and vocal warm-ups to ensure that your voice is in top form. Proper breathing techniques can help you control your breath and maintain a consistent tone throughout the recording.
Additionally, you should experiment with different microphone positions to find the sweet spot for your voice. You can try placing the mic slightly above or below your mouth, or at a distance of 6-8 inches away. This can help you achieve the desired sound and minimize any unwanted noise or distortion.
Gain Staging
Gain staging is another important factor to consider when recording deep vocals. You should set the gain on your preamp to a level that allows your voice to be heard clearly without any clipping or distortion. It’s important to find the right balance between the level of your voice and the level of the background noise.
One way to achieve this is by using a pop filter to reduce any plosive sounds that can cause distortion. You can also experiment with different microphone polar patterns to find the one that works best for your voice.
Compression Settings
Compression is a useful tool for controlling the dynamic range of your vocals. It can help you smooth out any peaks and valleys in your recording, resulting in a more consistent and polished sound. However, it’s important to use compression sparingly and not overdo it.
You should experiment with different compression settings to find the one that works best for your voice. A good starting point is a 2:1 ratio with a fast attack and release time. You can adjust the threshold and makeup gain to achieve the desired effect.
Related Posts:
Post-Processing Deep Vocals
After recording deep vocals with a condenser mic, the post-processing phase is crucial to enhance the quality of your recording. Here are some tips to help you achieve the best results.
Equalization Tips
Equalization is an essential tool to balance out the frequencies in your recording. For deep vocals, you may need to adjust the low frequencies to remove any muddiness or boominess. Use a high-pass filter to cut off the unwanted low frequencies below 100Hz or 120Hz. Boosting the mid-range frequencies around 1kHz to 2kHz can add clarity and presence to the vocals. Finally, cutting the high frequencies above 10kHz or 12kHz can help to reduce any harshness or sibilance.
Effects and Enhancements
Adding effects and enhancements can help to bring out the character and emotion in your deep vocals. Reverb can create a sense of space and depth, while delay can add a sense of rhythm and movement. Compression can help to even out the dynamics and make the vocals sound more consistent. Saturation can add warmth and richness to the vocals. Experiment with different effects and enhancements to find the right balance for your recording.
Related Posts:
Conclusion
In conclusion, recording deep vocals with a condenser mic requires careful attention to detail. Follow these tips for best results:
- Choose a condenser mic with a low-frequency response, such as the AKG Pro Audio C414.
- Position the mic close to your mouth, but not too close to avoid pops and sibilance.
- Use a pop filter to reduce plosives and a windscreen to reduce breath noise.
- Monitor your recording levels to avoid clipping and distortion.
- Consider using a preamp or compressor to enhance your vocal sound.
By following these tips, you can achieve a clear and professional-sounding recording of your deep vocals. Remember to experiment with different mic positions and settings to find what works best for your voice.
Frequently Asked Questions
What techniques can improve the clarity of deep vocals when using a condenser microphone?
To improve the clarity of deep vocals when using a condenser microphone, you can try the following techniques:
1. Use a high-pass filter to remove unnecessary low-frequency noise.
2. Experiment with microphone placement to find the sweet spot where the vocals sound the clearest.
3. Use a reflection filter or vocal booth to reduce unwanted reflections and echoes.
4. Adjust the gain on your preamp to ensure that the signal is strong enough without clipping.
How do I properly set up a condenser mic for recording bass-rich vocals?
To properly set up a condenser mic for recording bass-rich vocals, follow these steps:
1. Connect your microphone and audio interface to your computer or recording device.
2. Turn on your audio interface and wait for it to power up.
3. Adjust the gain on your preamp to ensure that the signal is strong enough without clipping.
4. Position the microphone about 6-8 inches away from the singer’s mouth.
5. Experiment with microphone placement to find the sweet spot where the vocals sound the clearest.
What are some effective ways to reduce sibilance and plosives in deep vocal recordings?
To reduce sibilance and plosives in deep vocal recordings, try the following techniques:
1. Use a pop filter to reduce plosives caused by hard consonant sounds.
2. Position the microphone slightly above the singer’s mouth to reduce plosives.
3. Use a de-esser plugin in post-production to reduce sibilance caused by high-frequency sounds.
How can I enhance the warmth of deep vocals in post-production?
To enhance the warmth of deep vocals in post-production, try the following techniques:
1. Use EQ to boost the low frequencies in the vocal track.
2. Use a tube or tape emulation plugin to add warmth and saturation to the vocals.
3. Use a compressor to even out the levels of the vocal track and add sustain.
What are the best practices for positioning a singer in relation to a condenser microphone?
The best practices for positioning a singer in relation to a condenser microphone are as follows:
1. Position the microphone about 6-8 inches away from the singer’s mouth.
2. Position the microphone slightly above the singer’s mouth to reduce plosives.
3. Ensure that the singer is standing still and not moving around too much during the recording.
Can using a pop filter make a significant difference when recording deep vocals?
Yes, using a pop filter can make a significant difference when recording deep vocals. A pop filter can reduce plosives caused by hard consonant sounds, resulting in a cleaner and clearer vocal track.


