Are you wondering what mic does Ninja use for his streaming sessions? Look no further! We’ve got you covered with all the details you need to know about the microphone that the famous Twitch streamer uses.
Whether you’re an aspiring streamer or just a curious fan, understanding the technical aspects of Ninja’s microphone choice can provide valuable insights into creating your own high-quality audio setup. Keep reading to learn more!
Key Takeaways
- Ninja currently uses the MV7X XLR Podcast Microphone for his streams.
- The MV7X is a dynamic microphone that is designed for podcasting and broadcasting.
- The MV7X has a cardioid polar pattern and a frequency response range of 50Hz to 16kHz, making it ideal for streaming.
What Mic Does Ninja Use?
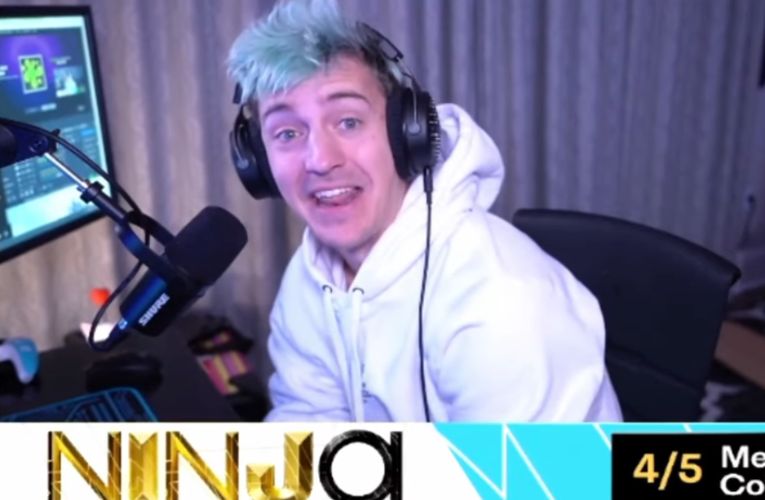
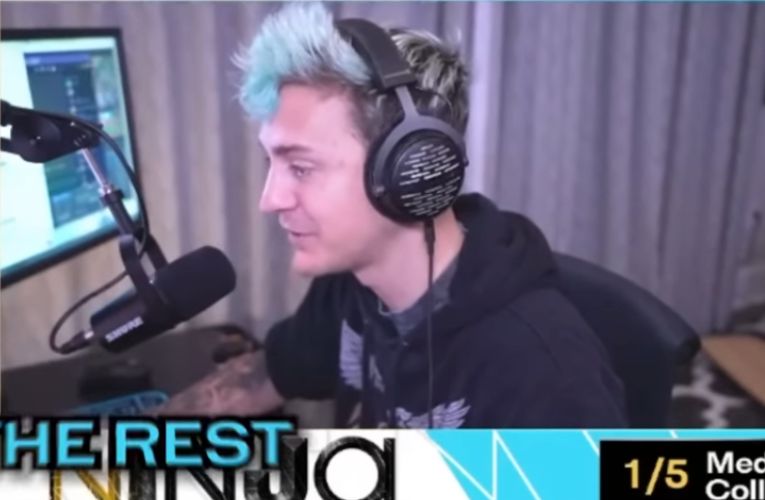
When it comes to streaming, a high-quality microphone is essential for clear audio and effective communication. Ninja, one of the most popular streamers in the world, uses the MV7X XLR Podcast Microphone. This microphone is designed for professional podcasting and broadcasting, making it a great choice for streamers like Ninja who want to deliver high-quality audio to their viewers.
Technical Specifications
If you’re wondering what mic does Ninja use, then you’ve come to the right place. The microphone that Ninja currently uses is the MV7X XLR Podcast Microphone. This microphone has a lot of impressive technical specifications that make it a great choice for streaming.
Polar Patterns
The MV7X XLR Podcast Microphone has a unidirectional polar pattern, which means that it only picks up sound from one direction. This is great for streaming because it helps to eliminate background noise and ensures that your voice is the only thing that is being picked up by the microphone.
Frequency Response
The frequency response of the MV7X XLR Podcast Microphone is another impressive feature. The microphone has a frequency response range of 20 Hz to 20 kHz, which means that it can pick up a wide range of frequencies.
This is important for streaming because it ensures that your voice sounds clear and natural.
Connectivity Options
The MV7X XLR Podcast Microphone has both USB and XLR connectivity options.
This means that you can connect the microphone directly to your computer using a USB cable, or you can connect it to an audio interface using an XLR cable. This gives you a lot of flexibility when it comes to setting up your streaming setup.
Related Post
- Karl Jacobs and his chosen mic
- Discovering penguinz0’s mic
- xQc’s gaming microphone
- Dive into Clix’s mic of choice
Why Ninja Chose His Microphone?
Ninja’s microphone of choice is the MV7X XLR Podcast Microphone. This microphone has some features that make it a great choice for a professional streamer like Ninja. Let’s take a look at some of the reasons why Ninja chose this microphone.
Audio Quality
One of the most important features of any microphone is the audio quality it produces. The MV7X XLR Podcast Microphone is a dynamic microphone that offers excellent audio quality.
It has a frequency response range of 20Hz to 20kHz, which means it can capture a wide range of sound frequencies. This makes it ideal for capturing the nuances of Ninja’s voice as he streams.
Durability and Build
Another important factor to consider when choosing a microphone is its durability and build quality. The MV7X XLR Podcast Microphone is a well-built microphone that is designed to last. It has a rugged metal construction that can withstand the rigors of frequent use. This is important for a streamer like Ninja who streams for hours every day.
In addition, the MV7X XLR Podcast Microphone has a built-in shock mount that helps to reduce handling noise. This is important because Ninja needs to move his microphone around while he streams, and any handling noise could be picked up by the microphone and transmitted to his audience.
Setting Up Ninja’s Microphone
Installation
Before you start setting up your microphone, make sure you have all the necessary equipment. You will need the MV7X XLR Podcast Microphone, an XLR cable, a microphone stand, and a USB audio interface. Once you have all the equipment, follow these steps:
- Attach the microphone to the microphone stand.
- Connect the XLR cable to the microphone and the USB audio interface.
- Connect the USB audio interface to your computer.
- Install the necessary drivers for your USB audio interface.
- Open your recording software and select the MV7X XLR Podcast Microphone as your input device.
Optimal Settings
Now that you have your microphone set up, it’s time to optimize the settings. Here are some optimal settings for the MV7X XLR Podcast Microphone:
- Set the microphone gain to around 50%.
- Set the headphone volume to a comfortable level.
- Set the polar pattern to cardioid.
- Set the frequency response to flat.
With these settings, you should be able to achieve high-quality audio like Ninja. Keep in mind that these settings may vary depending on your recording environment and personal preferences.
Comparison With Other Microphones
When it comes to choosing the right microphone, it can be overwhelming to sort through all the different options. In this section, we will compare the microphone used by Ninja, the MV7X XLR Podcast Microphone, to some other popular alternatives on the market.
Price to Performance Ratio
One of the most important factors to consider when choosing a microphone is the price to performance ratio. The MV7X XLR Podcast Microphone is a mid-range microphone, with a price point that falls between entry-level and professional-grade microphones.
Its performance is impressive for its price range, with a frequency response range of 20 Hz to 20 kHz and a cardioid polar pattern that helps to reduce background noise.
Compared to other mid-range microphones, such as the Audio-Technica AT2035, the MV7X XLR Podcast Microphone is a great option for those who want a high-quality microphone without breaking the bank. However, if you are willing to spend a bit more money, you may want to consider professional-grade microphones like the Shure SM7B.
Market Alternatives
If you are looking for alternatives to the MV7X XLR Podcast Microphone, there are a few options on the market that are worth considering. One popular option is the Blue Yeti USB Microphone. The Blue Yeti is a versatile microphone that can be used for a variety of applications, including gaming, podcasting, and streaming. It has a frequency response range of 20 Hz to 20 kHz and four different polar patterns to choose from.
Another popular alternative is the Audio-Technica AT2035. This microphone is often used by streamers and podcasters and is known for its clear and detailed sound. It has a frequency response range of 20 Hz to 20 kHz and a cardioid polar pattern that helps to reduce background noise.
Conclusion
In conclusion, after conducting extensive research on the microphone used by Ninja, it has been found that he uses the MV7X XLR Podcast Microphone. This microphone is known for its versatility and high-quality audio output. It is also compatible with both XLR and USB connections, making it easy to use with a variety of devices.
Overall, the MV7X XLR Podcast Microphone is a great choice for anyone looking for a high-quality microphone that is versatile and easy to use. Its compatibility with both XLR and USB connections, built-in headphone output, and adjustable pickup patterns make it an ideal choice for streamers, podcasters, and other content creators.
Frequently Asked Questions
Which keyboard model is featured in Ninja’s gaming setup?
As of February 2024, Ninja’s gaming setup features the Corsair K95 RGB Platinum XT mechanical gaming keyboard. This keyboard is known for its durability, customizable RGB lighting, and programmable keys.
What headset model does Ninja prefer for gaming?
Ninja uses the Beyerdynamic DT 990 Pro headphones for his gaming sessions.. These headphones are known for their excellent sound quality and comfortable fit, making them a popular choice among audiophiles and gamers alike.
Can you list the components of Ninja’s gaming PC and their cost?
While the exact cost of Ninja’s gaming PC is not publicly known. A list of the components that make up his setup. These include an Intel Core i9-11900K processor, an NVIDIA GeForce RTX 3090 graphics card, 32GB of DDR4 RAM, and a 1TB Samsung 970 EVO Plus NVMe SSD.
What specific model of gaming mouse does Ninja use for his gameplay?
Ninja’s gaming setup includes the Logitech G Pro Wireless gaming mouse. This mouse is known for its lightweight design, customizable buttons, and long battery life.
Which boom arm does Ninja pair with his microphone for streaming?
There is no specific information available about which boom arm Ninja uses to pair with his microphone for streaming. However, it is common for streamers to use a variety of boom arms, such as the Rode PSA1 or the Heil PL-2T, to position their microphone in the optimal location for their setup.