Are you looking to record high-quality audio on your iPhone using an external microphone with Audacity? Whether you’re a podcaster, musician, or content creator, recording audio on your iPhone with Audacity and an external microphone can help you achieve professional-level sound quality. In this article, we’ll guide you through the process of recording on your iPhone with an external microphone using Audacity.
You’ll learn how to connect your external microphone to your iPhone, configure Audacity and recording settings, and apply recording techniques to achieve the best possible sound quality. With our step-by-step instructions and tips, you’ll be able to create high-quality audio recordings on your iPhone in no time. So, let’s get started!
Key Takeaways
- Recording on your iPhone with an external microphone and Audacity can help you achieve professional-level sound quality.
- To record on your iPhone with an external microphone, you’ll need to connect your microphone to your iPhone and configure Audacity and recording settings.
- Applying recording techniques and monitoring your audio can help you achieve the best possible sound quality.
How to Record on iPhone with External Microphone Audacity?
If you want to record high-quality audio on your iPhone using an external microphone and Audacity, you need to follow a few simple steps. In this guide, we will show you how to choose the right microphone, connect it to your iPhone, and set up the recording environment to get the best results.
Choosing the Right Microphone
Before you start recording, you need to choose the right microphone for your needs. There are several types of microphones that you can use with your iPhone, including lavalier microphones, shotgun microphones, and USB microphones. Each type of microphone has its own advantages and disadvantages, so you need to choose the one that best suits your needs.
If you are recording audio in a noisy environment, a shotgun microphone is a good choice because it can pick up sound from a specific direction and reject background noise. If you are recording a podcast or a voiceover, a USB microphone is a good choice because it provides high-quality audio and is easy to set up.
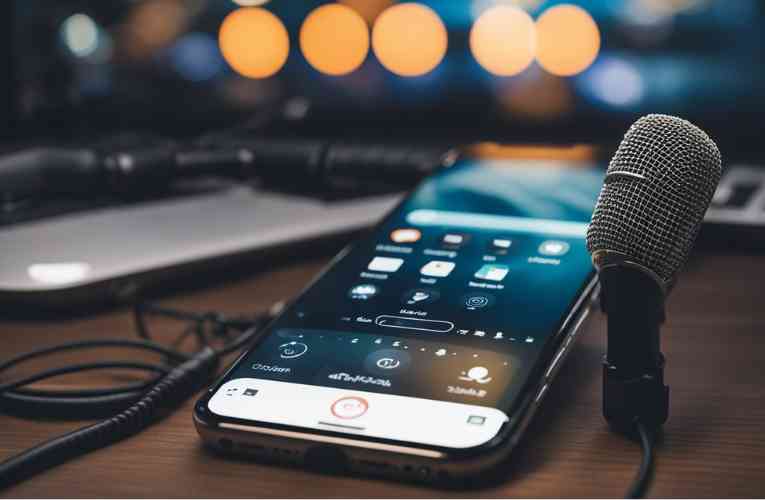
Connecting the Microphone to iPhone
Once you have chosen the right microphone, you need to connect it to your iPhone. To do this, you will need a TRRS adapter or a lightning port adapter, depending on the type of microphone you are using. You can find these adapters at any electronics store or online.
Once you have the adapter, connect it to your iPhone and then connect your microphone to the adapter. Make sure that the microphone is securely connected to the adapter and that the adapter is securely connected to your iPhone.
Setting Up the Recording Environment
To get the best results, you need to set up the recording environment properly. Find a quiet room where you can record without any background noise. If you are recording a podcast or a voiceover, use a pop filter to reduce plosives and other unwanted sounds.
Once you have set up the recording environment, open Audacity on your iPhone and select the external microphone as the input device. Adjust the microphone volume to get the best audio quality, and then start recording.
With these simple steps, you can record high-quality audio on your iPhone using an external microphone and Audacity.
Related Posts:
- Exceptional External Mics for Your iPhone
- Quick Tips on Using a Microphone with Your iPhone
- iPhone microphone bias voltage explained
- Checking External Microphone on iPhone: A Guide
- Using external microphones with the Belkin iPhone splitter
Configuring Audacity and Recording Settings
If you want to record on iPhone with an external microphone using Audacity, you need to configure the recording settings correctly. In this section, we will show you how to import audio from your iPhone, adjust audio levels and quality, and configure Audacity for recording.
Importing Audio from iPhone
Before you start recording, you need to import audio from your iPhone into Audacity. To do this, connect your iPhone to your computer using a lightning cable. Then, open Audacity and select “Import Audio” from the “File” menu. Choose the audio file you want to import, and click “Open.”
Adjusting Audio Levels and Quality
To ensure high-quality audio recording, you need to adjust the recording level and audio quality in Audacity. First, make sure your external microphone is connected to your iPhone and recognized by Audacity. Then, select your microphone from the drop-down menu in the “Recording” section of the “Devices” tab.
Next, adjust the recording level to ensure that the audio is not too loud or too quiet. You can do this by adjusting the slider in the “Recording Volume” section of the “Devices” tab. You should also check the “High Quality” box in the “Quality” section to ensure that your recording is of the highest quality possible.
Once you have adjusted the recording level and quality, you are ready to start recording. Simply press the “Record” button in Audacity, and start speaking into your external microphone.
Related Posts:
Recording Techniques and Monitoring
When it comes to recording on your iPhone using an external microphone in Audacity, there are a few techniques and monitoring practices that you should keep in mind to ensure a high-quality recording.
Optimizing Microphone Placement
The placement of your external microphone is crucial when it comes to recording high-quality audio. To get the best results, move the microphone closer to the sound source, such as your voice or an instrument. This will help to minimize background noise and ensure that the audio is clear and crisp.
Monitoring and Adjusting the Recording in Real-Time
Monitoring and adjusting the recording in real-time is also important to ensure that the audio levels are optimal. In Audacity, you can monitor the recording by using the built-in audio level meters. Adjust the recording levels as necessary to ensure that the audio is not too loud or too soft. You can also use the audio level meters to identify any clipping or distortion in the recording, which can be fixed by adjusting the recording levels or moving the microphone further away from the sound source.
To adjust the recording levels, you can use the iPhone’s Settings app to adjust the microphone input volume. You can also use the external microphone’s volume controls or gain settings to adjust the recording levels.
Related Posts:
- iPhone External Microphone Volume Control
- How to Toggle External Microphone Settings on iPhone
- External Mic Input on the iPhone 6
Conclusion
In conclusion, recording with an external microphone on your iPhone using Audacity is a simple process that can greatly improve the audio quality of your recordings. By following the steps outlined in this article, you can easily connect your external microphone to your iPhone and start recording in Audacity.
Remember to choose a compatible microphone, connect it to your iPhone using the appropriate adapter, and select it as the recording device in Audacity. Adjust the microphone volume as needed and be sure to monitor your levels to avoid clipping or distortion.
With the right equipment and settings, you can achieve professional-quality recordings on your iPhone using Audacity and an external microphone. Whether you’re recording music, podcasts, or voiceovers, this method can help you achieve the results you’re looking for.
Frequently Asked Questions
What steps are required to configure an external microphone in Audacity on a Mac?
To configure an external microphone in Audacity on a Mac, you need to follow these steps:
- Connect your microphone to the computer using a USB or audio jack.
- Open Audacity and go to the “Audacity” menu.
- Select “Preferences” and then “Devices”.
- Choose your microphone from the list of available recording devices.
- Adjust the input volume as needed.
- Click “OK” to save your changes.
How can I troubleshoot issues with my microphone not working in Audacity?
If your microphone is not working in Audacity, here are some troubleshooting steps you can try:
- Make sure your microphone is properly connected to your computer and turned on.
- Check that your microphone is selected as the recording device in Audacity’s preferences.
- Ensure that your microphone is not muted or the volume is not too low.
- Try restarting Audacity and your computer.
- If none of these steps work, try using a different microphone or contacting the manufacturer for support.
What is the process for recording audio on Audacity using a USB microphone?
To record audio on Audacity using a USB microphone, follow these steps:
- Connect your USB microphone to your computer.
- Open Audacity and select your USB microphone as the recording device.
- Click the “Record” button to start recording.
- When you’re finished recording, click the “Stop” button.
- Edit your recording as needed and save the file.
Can you record system audio and microphone input simultaneously in Audacity?
Yes, you can record system audio and microphone input simultaneously in Audacity. To do so, you need to use a third-party software such as Soundflower or Loopback to route the audio. Once you have set up the routing, you can select the appropriate input devices in Audacity and start recording.
How do you add a microphone input to Audacity on a Mac?
To add a microphone input to Audacity on a Mac, follow these steps:
- Connect your microphone to your computer.
- Open Audacity and go to the “Audacity” menu.
- Select “Preferences” and then “Devices”.
- Choose “Core Audio” as the host and select your microphone as the recording device.
- Adjust the input volume as needed.
- Click “OK” to save your changes.
Where can I find the latest version of Audacity for download?
You can download the latest version of Audacity from the official website at https://www.audacityteam.org/download/.